Tickets
The Tickets menu gives you an opportunity to find a list of all tickets regarding all the activities of the business. This is composed of tickets that are being approved, in case the chosen business process needs it, and tickets that are still under active progression. The Tickets menu provides a list of tickets, including those under approval and those that are in-progress .
Creating Ticket
- When creating a new ticket, you must select the Business Process it belongs to, which ensures the ticket follows the correct workflow and approvals. Next, choose the Product Group, which directs the task to the right people based on the issue type.After selecting the Business Process, the related Subject will appear automatically, and you can add more information if needed. Once you choose the Product Group, you can select the specific Product. Any Custom Fields linked to the product group will also appear and must be filled in. Once all details are entered, click “Save” to generate the ticket.
1.Navigate to the main Tickets menu.Click the orange button to open the ticket creation page, where you can begin entering the ticket details.
After clicking on "Add Ticket", you will see an option to create a ticket for another user. To do this, click on the icon highlighted with a red circle in the image below. This will open a form where you can enter the necessary details for creating a ticket on behalf of someone else.
The system allows you to create a task on behalf of another person, like a customer or supplier.
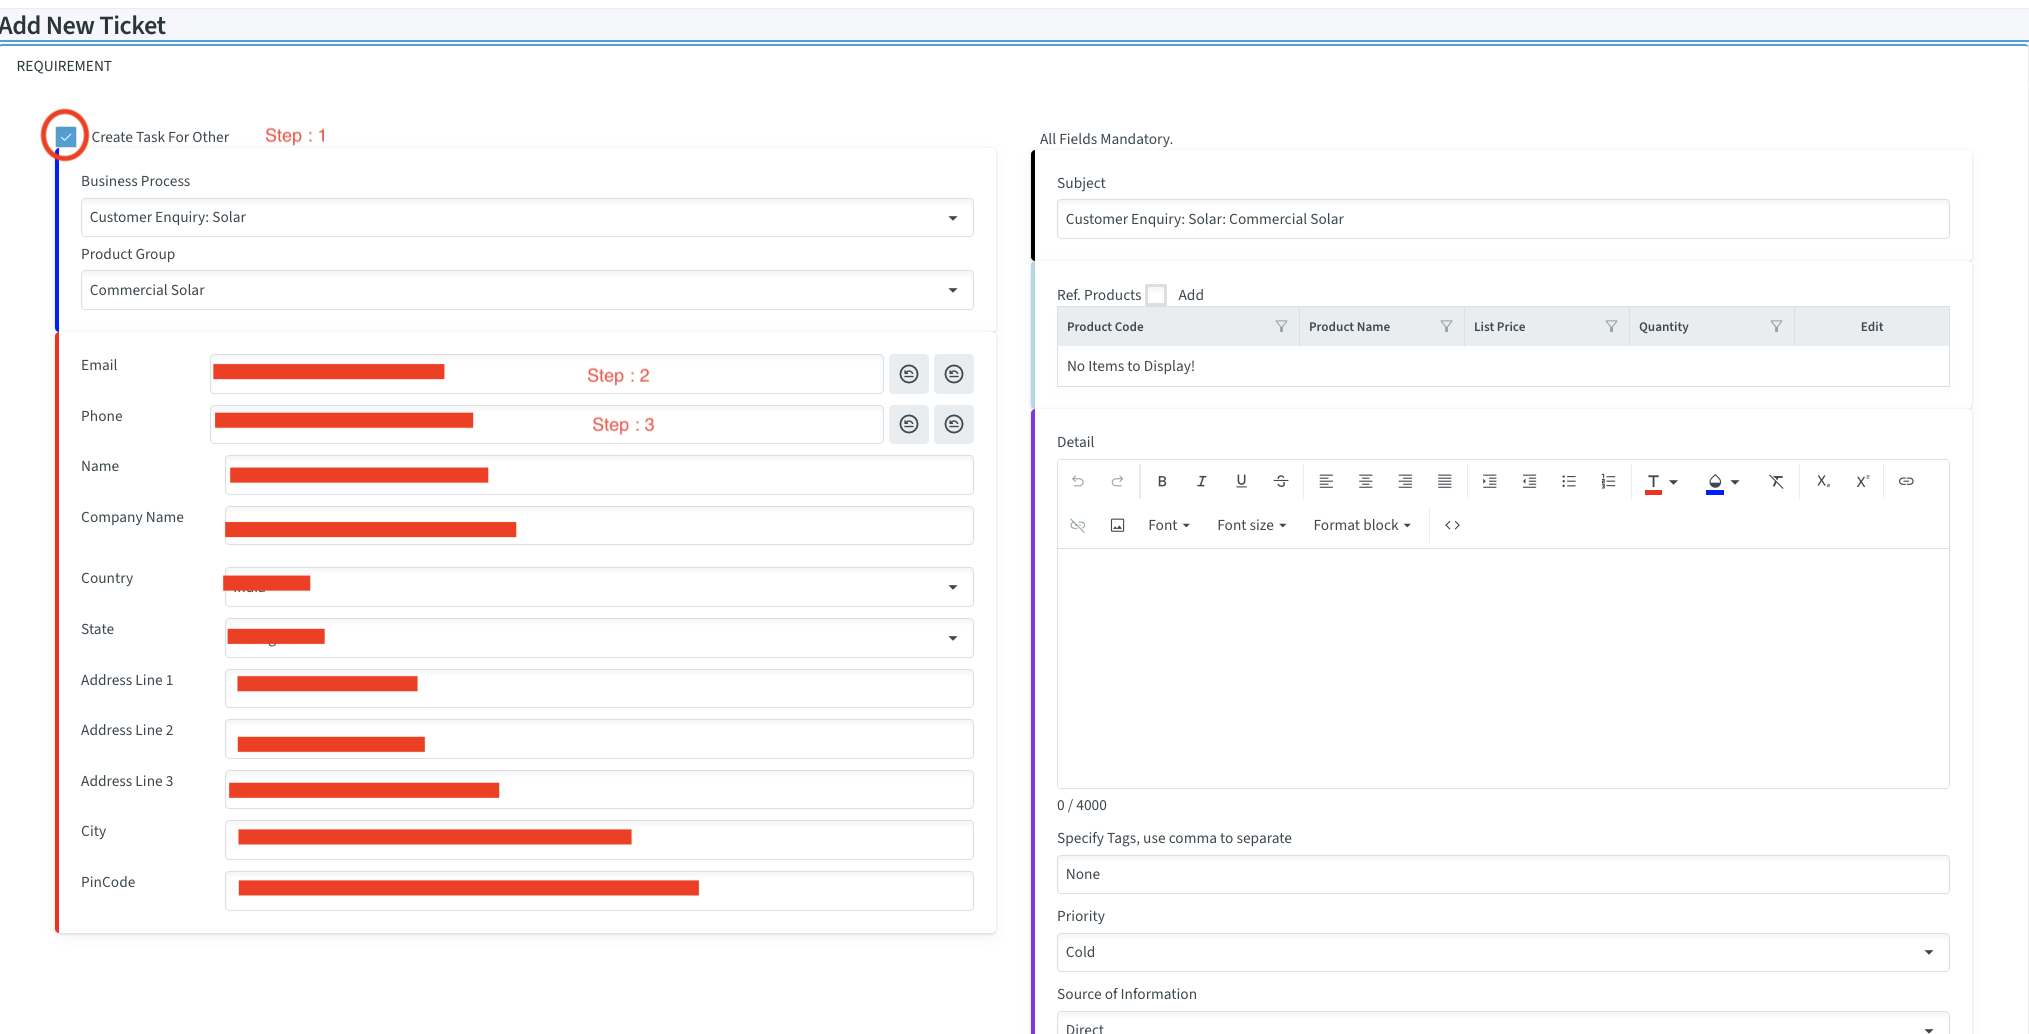
- On the "Add New Ticket" page, check the box labeled "Create Task For Other".
- The form will expand, prompting you for details like an email address or phone number.
- Enter the person's email or phone number and click the search button beside the box.
- If the system matches an existing user, their information will be retrieved automatically.
- If no match is found, you can manually enter their contact information.
Note
For this feature to work correctly, the individual must already exist in the system’s contact list for the task to be correctly associated with them.
- Properly categorizing a ticket is crucial for routing it to the right team and ensuring a fast resolution.
Business Process and Product Group:
- First, select the Business Process (e.g., Customer Complaint, Supplier Registration) to ensure the ticket follows the correct workflow and approvals.
- Next, choose the Product Group to direct the task to the team responsible for that product.
Subject, Products, and Custom Fields:
- After selecting the Business Process, the Subject line will auto-populate, which you can then edit if needed.
- Select the specific Product related to the ticket.
- Fill in any Custom Fields that appear, as these are linked to the product group and must be filled in as required.
Saving the Ticket:
- After completing all mandatory fields, click "Save" to generate the ticket.Your new ticket will now appear in the "Existing Tickets" list.
Converting Emails into Tickets
- You can convert emails directly into tickets from the dashboard.

- Click the Mail icon on the Dashboard to go to your integrated inbox.
- Use the filters to find an email.You can filter by "New Only" to see new emails or select a date range. Click Refresh to apply the filter.
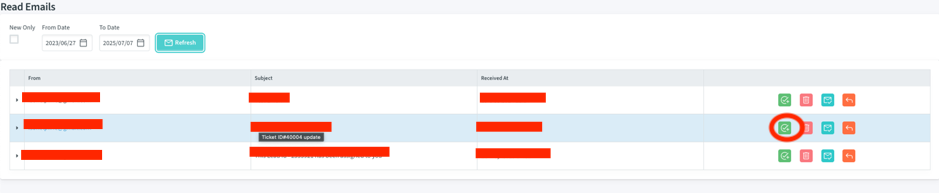
- From the email list, click the green checkmark button to begin the conversion.
- The "Add New Ticket" form will appear, pre-filled with information from the email.
- Fill in any remaining mandatory fields and click Save.
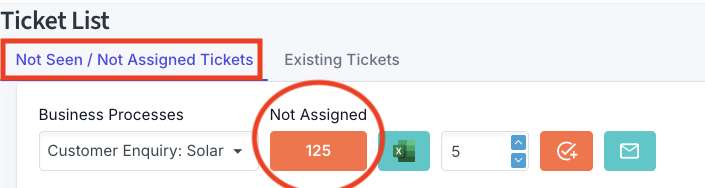
Navigating the Ticket List
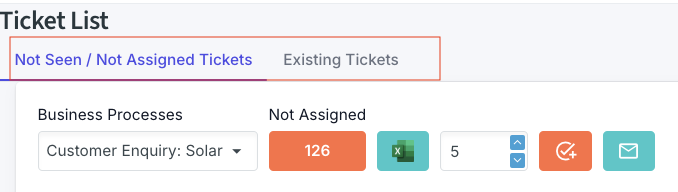
In the Ticket List, you will find two tabs that categorize all tickets: Approved Tickets and Non-Approved Tickets. These tabs are highlighted in red in the image above. You can easily navigate between these tabs to view and manage tickets based on their approval status.
click on tab for more deatils:
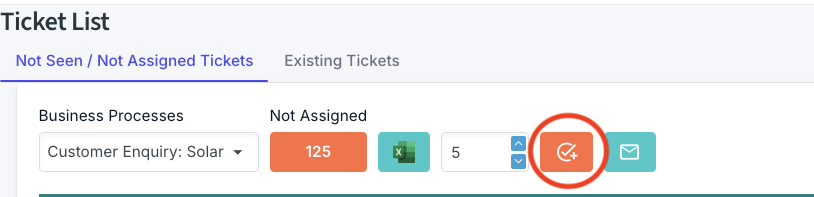
- Now you need to approve the ticket by clicking approve button shown in the picture below to this text.

From the "Not Seen / Not Assigned Tickets" list, click the Approve button in the corresponding ticket row.
This opens the Ticket Approval screen, which has two :
- ORIGINAL MESSAGE: Displays the full details of the initial request.
- TASK REVIEW & ASSIGNMENT: Allows you to approve and assign the ticket.
In the assignment tab, you must:
- Select a Workflow (the sequence of processes).
- Assign the task to a Team and a specific Team Member.
Note
The user approving the ticket must be a member of a team within the first process of the selected workflow.
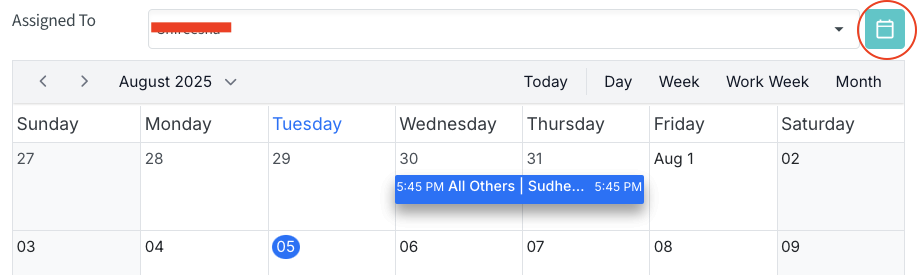
Before assigning the task, the system provides an option to check the employee’s availability. You can view their schedule and select the most suitable date and time to ensure smooth planning.
By assigning tickets through this process, you will be able to track the workload assigned to each employee. This allows you to check when a particular employee is occupied or available for new tasks. It also helps in managing workload efficiently and ensures equal distribution of work among team members, avoiding overloading a single user while keeping track of pending tasks for better workflow management.
After filling in all details, the ticket is approved and moves to the first stage of the workflow.
Filtering and Viewing Your Tickets

- The "Filter On" dropdown in the Ticket List provides several predefined views to help you find relevant tickets quickly:
- Started by Me: Shows all tickets that you have personally created or raised.Useful for tracking the progress of issues you’ve reported.
- Assigned by Me: Displays tickets that you have assigned to other users. Helps you monitor how the tasks you've delegated are progressing.
- Assigned to Me: Lists all tickets that are currently assigned to you for action.
- Within My Group: Shows tickets assigned to any member of your team or user group.
Following Up on a Ticket

- From the "Existing Tickets" list, click the Reply button on any ticket to open its follow-up page. This screen provides the complete history and allows you to add updates or close the ticket.
The screen is divided into three tabs:
- Original Message: Shows the initial problem or request. You can click "Allow Edit" to update ticket details or change the selected product.
- Past Communication: A complete history of all previous communications, including response messages, activities, and file attachments related to the ticket.
- Current Response: Where you can add a reply or close the ticket.
In the Current Response tab, you can manage the ticket's entire lifecycle.
- Workflow Components:
- Process: Move the ticket to the next stage in the workflow (e.g., from "Sales" to "Installation"). You can also assign it to any independent process if required.
- Activity: Define the specific next action, such as "Get Clarity" or "Site Survey".
- User Team & Assigned To: Assign the task to a different team or a specific team member to ensure accountability.
- Scheduling and Communication:
- Start/End Date: Set deadlines for the task. You can check an employee's schedule before assigning a date to ensure they are available.
- Priority: Set the urgency of the task (e.g., Normal, High, or Urgent).
- Reply Type: This critical setting controls message visibility:
- Reply to Customer: The message is visible to the customer. Use this for progress updates or requests for information.
- Internal Process: The message is visible only to your internal team. Use this for internal notes and coordination.
- Closing a Ticket:
- If the issue could not be resolved, choose Closed Fail. You will be prompted to select a Fail Reason (e.g., Price, Late in Response). This data is used for analysis and helps management identify areas for improvement.
Create Gantt Charts In Ticket

- You can create a Gantt Chart to visualize the Ticket timeline.
- In the project follow-up screen, navigate to the Create Project Flow tab.
- Select the workflow, set the project start and end dates, and fill in other parameters.
- Click Generate to create the Gantt chart.
- After making any adjustments, click Save. The system saves a version of the chart. You can later load any previous version to review past plans, make changes, and save it again as the latest version.